Internationalization (i18n) and Translations for Mapwarper. (English, Dutch, Japanese)

mapwarper_locale

Many thanks to Ellen Gehring of Erfgoed Leiden en Omstreken for the Dutch translations. Ellen with the ELO wanted their own warper and because of this, support for locales, internationalisation and translations was added to the codebase.  Huge thanks to Kamata Ryo for the work on the Locale Changer and the Japanese translations.

If you would like to see your own language, let me know.  We’ve used both LocaleApp and normal Github pull requests.

New shortcuts and add layer features in mapwarper.net

Mapwarper.net has been updated with several months of the latest code. Some of these features are directed towards the rectify map interface with the addition of keyboard shortcuts and the new search and add custom layer tool. If you want to support mapwarper.net donate to paypal.me/timdevelops!

Search for existing map and mosaics and add to the map

Search for warped maps and mosaics (previously called layers) to add to the reference map.

Add Z/X/Y tiles to reference layer

Instead of searching for maps, paste in a map template string into the box. In the animation below, we get a template from another warper and add that in. You can use any tiles so long as they are in the ZXY ordered scheme e.g. https://example.com/osm/{z}/{x}/{y}.png

Keyboard shorcuts: Change Mode  & Place Point

Use 1, 2 and 3 on your keyboard to change mode from place point, add point and move map modes.

Press “q” to place a point at the mouse cursor – regardless of the map mode. This enables you to quickly move around and add points

Quick Place and Quick Save

In this animation, the user has the move map control mode activated, and they move the mouse of the maps, and click “q” to quickly place point at mouse location. They then hit “e” or “return” to save that point – that saves you clicking the  “add control point” button!

Auto Place Point – MAGIC!

Here the “a” key is pressed to (similar to the q key) drop a point where the mouse is, but crucially, another point on the other map is added. This works if the point you add is on either map. The other map is zoomed to that new point. You’d need at least 2 points to give this a go.

(It uses a helmert transform to work out, based on the existing points, where to add the other point – so it’s a simple 2D transform and won’t be accurate for very warped maps)

What’s coming to Mapwarper.net – new stuff!

Mapwarper.net is getting an upgrade of code early this first week in April.

New things:

  • Keyboard shortcuts
  • New JSON-API and docs
  • Map caching for faster maps
  • Bigger map windows
  • Upgraded Ruby and Rails versions
  • Changed “my maps” to “favourites”
  • Changed “layers” to “mosaics”
  • Social logins – OpenStreetMap, Github and Facebook
  • Year / date search
  • Translation support
  • Added Mapbox Satellite layer
  • Search for an existing map or mosaic to help rectification
  • Ability to add an “Z/X/Y” Tile layer to help rectification
  • Upload CSV of Control Points for a map
  • Download CSV of control points for any map
  • Many bugs fixed and much other things I forgot to list above!

Screenshot_2017-04-02_19-14-00

You might particularly enjoy the keyboard shortcuts:

Screenshot_2017-04-02_19-11-38

The “a” shortcut does some auto-magic where if you have 3 or more points, it will automatically place the other point at the place where it thinks works best.

GIFrecord_2017-04-02_193003.gif

Quick place “q” and save point “e” then Auto place “a” twice and save point “e”.                      Click the image for bigger

To try out these latest features yourself visit http://mapwarper.net

Let me know what you think!

If you wish to support the hosting and development of this project, you can donate to Tim via PayPal here: paypal.me/timdevelops


Mapwarper Tutorial & Spatial Humanities Workshop by Lincoln Mullen

Lincoln Mullen has written a great series of workshops on the Spatial / Digital Humanities over five days. Day 3 is focused around Georectification with Mapwarper.net and is a very good tutorial.
mapwarper-preview.png
The full workshop contents are here, and I recommend you to check them out:
Day 1: Introduction and Setup | Map Literacy | Narrative Maps
Day 2: Data Maps | QGIS
Day 3: Georectification | Working with Spatial Data
Day 4: Deep Maps | From Manuscripts to Maps
Day 5: Programmatic Maps

Lincoln is an assistant professor in the Department of History and Art History at George Mason University, working on the history of American religions as a digital historian.

The link to the Georectificaiton Workshop is here: http://lincolnmullen.com/projects/spatial-workshop/georectification.html

The screenshot of the tutorial is below the fold. Continue reading

Doing Digital History 2016 – Map Warper Tutorial

Doing Digital History 2016 is a two week Summer institute sponsored by National Endowment for the Humanities and was held at George Mason university in DC/Arlington earlier in the year. It was attended by “mid-career” historians and the focus was on digital humanities and history – making visualizations, mapping, sound and vision, and more.

Screen-Shot-2016-07-07-at-4.11.16-PM.png

I was happy to see that the participants had a workshop Georectifying maps with Map Warper.

Here’s the screenshot of the tutorial:


Mapwarper featured in A Digital Humanities Primer for English Students

Jenna Herdman has written an excellent free e-book about Digital Humanities for English Students which has an entire chapter titled: Digital Mapping Tool Tutorial which features the Mapwarper. It’s been published using gitbook and is available in pdf, html, epub formats.

The tutorial covers adding a map to mapwarper.net to chart the movements of David in Charles Dickens’s David Copperfield.

unspecified-2

The map is then loaded into Palladio which is a new tool for me. it “is a web-based platform for the visualization of complex, multi-dimensional data”.

unspecified-1

Do check out this great resource. The book has seven chapters in total and all of them are interesting and worthwhile to read! https://www.gitbook.com/book/jennaherdman/a-digital-humanities-primer-for-english-students/details

Screenshot after this read more tag:


Continue reading

Colliding The Mental Maps of Edinburgh with Mapwarper.net

Last autumn I popped up to Edinburgh from the North of England for State of the Map Scotland conference. Together with Edinburgh College of Art in Evolution House participants took part in series of workshops “Map.Makars”

I took part in a memory map of the city. The rules were: no looking at other maps, the map should include the venue, the castle, the train station. We drew, from memory the city on large pieces of paper. Gregory scanned/photographed these and put these on mapwarper.net to stretch them to fit. he then combined these together with an interactive and animated transparency control to create the Hand Drawn Map Collider “No-map Map Give it a whirl! http://www.livingwithdragons.com/maps/nomap-map/

Screenshot from 2016-04-22 11:26:11.png

My map, in case you were wondering was possibly the least accurate of them, coming from furthest away! http://mapwarper.net/maps/10907

Screenshot from 2016-04-22 11:28:00.png


OpenStreetMap Ireland & MapWarper.net completed all 675 Sheets for Townlands.ie

The OpenStreetMap Ireland community and http://www.townlands.ie/ have rectified all 675 sheets on Mapwarper.net leading towards the goal of mapping all Townloads in OpenStreetMap. Awesome stuff, it’s a very cool project.

They have also just surpassed adding 47,000 townlands!

cx54-6iwqae86i1

cx55dkiwkaa6u0rcx55cd1w8ae535o

Devise Omniauth OAuth Strategy for MediaWiki (Wikipedia, WikiMedia Commons)

Authentication of MediaWiki users with a Rails Application using Devise and Omniauth

Wikimaps is a Wikimedia Commons project to georeference/georectify historical maps. Read the wikimaps blog here. It is using a customised version of the Mapwarper open source map georectification software as seen on http://mapwarper.net to speak with the Commons infrastructure and running on Wikimedia Foundations Labs servers. We needed a way to allow Commons users to log in easily.  And so I developed the omniauth-mediakwiki strategy gem so your Ruby applications can authenticate on WikiMedia wikis, like Wikipedia.org and Wikimedia Commons.

e0974880-2ef0-11e4-9b51-e96f339fe90c

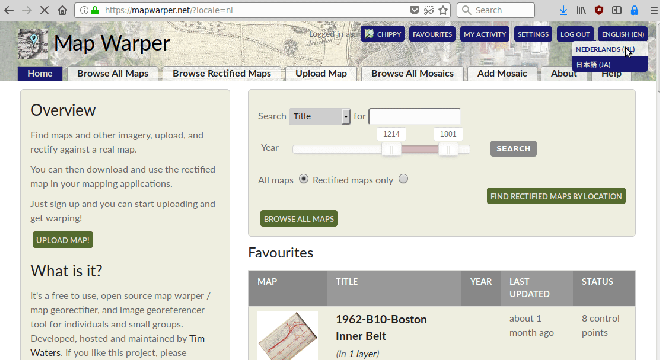
The Wikimaps Warper application uses Devise – it works very nicely with Omniauth. The above image shows traditional login with username and password and, using OmniAuth, to Wikimedia Commons, GitHub and OpenStreetMap.

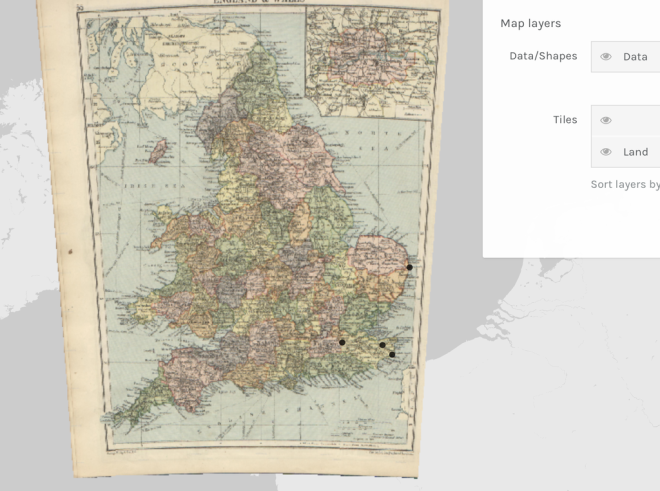
After clicking the Wikimedia Commons button the user is presented with this:oauth

It may not be that pretty, but the user allowing this will redirect back to our app and the user will be logged in.

This library used the omniauth-osm library as an initial framework for building upon.

The code is on github here:   https://github.com/timwaters/omniauth-mediawiki

The gem on RubyGems is here: https://rubygems.org/gems/omniauth-mediawiki

And you can install it by including it in your Gemfile or by doing:

gem install omniauth-mediawiki

Create new registration

The mediawiki.org registration page is where you would create an OAuth consumer registration for your application. You can specify all wikimedia wikis or a specific one to work with. Registrations will create a key and secret which will work with your user so you can start developing straight away although currently a wiki admin has to approve each registration before other wiki users can use it.  Hopefully they will change this as more applications move away from HTTP Basic to more secure authentication and authorization strategies in the future!

Screenshot from 2014-09-03 21:08:33

Usage

Usage is as per any other OmniAuth 1.0 strategy. So let’s say you’re using Rails, you need to add the strategy to your `Gemfile` alongside omniauth:

gem 'omniauth'
gem 'omniauth-mediawiki'

Once these are in, you need to add the following to your `config/initializers/omniauth.rb`:

Rails.application.config.middleware.use OmniAuth::Builder do
 provider :mediawiki, "consumer_key", "consumer_secret"
end

If you are using devise, this is how it looks like in your `config/initializers/devise.rb`:

config.omniauth :mediawiki, "consumer_key", "consumer_secret", 
    {:client_options => {:site => 'http://commons.wikimedia.org' }}

If you would like to use this plugin against a wiki you should pass this you can use the environment variable WIKI_AUTH_SITE to set the server to connect to. Alternatively you can pass the site as a client_option to the omniauth config as seen above. If no site is specified the http://www.mediawiki.org wiki will be used.

Notes

In general see the pages around https://www.mediawiki.org/wiki/OAuth/For_Developers for more information

When registering for a new OAuth consumer registration you need to specify the callback url properly. e.g. for development:

http://localhost:3000/u/auth/mediawiki/callback
http://localhost:3000/users/auth/mediawiki/callback

This is different from many other OAuth authentication providers which allow the consumer applications to specify what the callback should be. Here we have to define the URL when we register the application. It’s not possible to alter the URL after the registration has been made.

Internally the strategy library has to use `/w/index.php?title=` paths in a few places, like so:

:authorize_path => '/wiki/Special:Oauth/authorize',
:access_token_path => '/w/index.php?title=Special:OAuth/token',
:request_token_path => '/w/index.php?title=Special:OAuth/initiate',

This could be due to a bug in the OAuth extension, or due to how the wiki redirects from /wiki/Special pages to /w/index.php pages….. I suspect this may change in the future.

Another thing to note is that the mediawiki OAuth implementation uses a cool but non standard way of identifying the user.  Omiauth and Devise needs a way to get the identity of the user. Calling '/w/index.php?title=Special:OAuth/identify' it returns a JSON Web Token (JWT). The JWT is signed using the OAuth secret and so the library decodes that and gets the user information.

Calling the MediaWIki API

Omniauth is mainly about authentication – it’s not really about using OAuth to do things on their behalf – but it’s relatively easy to do so if you want to do that. They recommend using it in conjunction with other libraries, for example, if you are using omniauth-twitter, you should use the Twitter gem to use the OAuth authentication variables to post tweets. There is no such gem for MediaWiki which uses OAuth. Existing  Ruby libraries such as MediaWiki Gateway and MediaWIki Ruby API currently only use usernames and passwords – but they should be looked at for help in crafting the necessary requests though.

So we will have to use the OAuth library and call the MediaWiki API directly:

In this example we’ll call the Wikimedia Commons API

Within a Devise / Omniauth setup, in the callback method, you can directly get an OAuth::AccessToken via request.env["omniauth.auth"]["extra"]["access_token"] or you can get the token and secret from request.env["omniauth.auth"]["credentials"]["token"] and request.env["omniauth.auth"]["credentials"]["secret"]

Assuming the authentication token and secret are stored in the user model, the following could be used to query the mediawiki API at a later date.

@consumer = OAuth::Consumer.new "consumer_key", "consumer_secret",
            {:site=>"https://commons.wikimedia.org"}
@access_token = OAuth::AccessToken.new(@consumer, user.auth_token, user.auth_secret)
uri = 'https://commons.wikimedia.org/w/api.php?action=query&meta=userinfo&uiprop=rights|editcount&format=json'
resp = @access_token.get(URI.encode(uri))
logger.debug resp.body.inspect
# {"query":{"userinfo":{"id":12345,"name":"WikiUser",
# "rights":["read","writeapi","purge","autoconfirmed","editsemiprotected","skipcaptcha"],
# "editcount":2323}}}

Here we called the Query action for userinfo asking for rights and editcount infomation.